
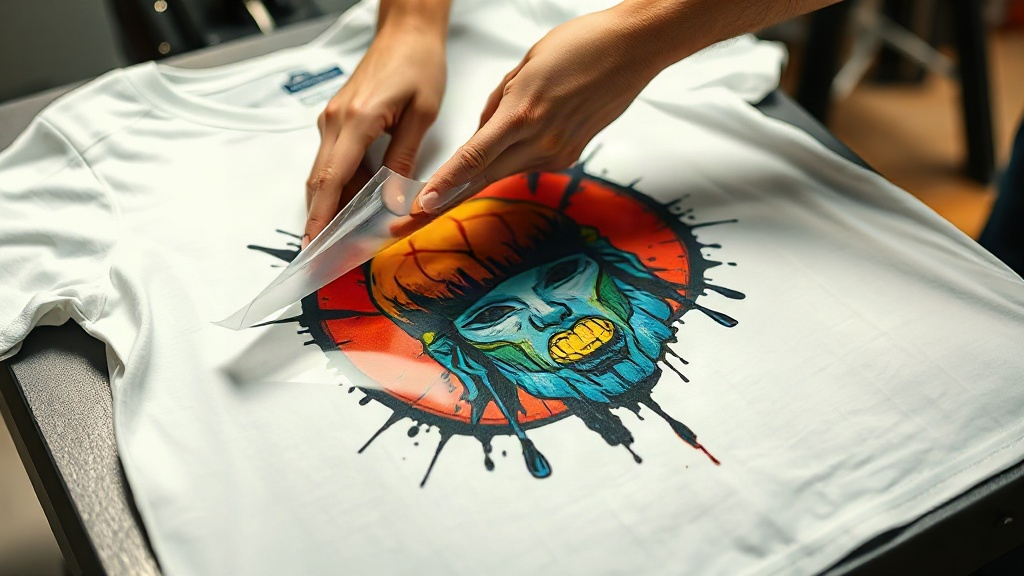
When I first started experimenting with custom apparel, I cycled through screen printing, vinyl, and even sublimation. Each had its merits, but none matched the versatility and ease of DTF Transfers. Direct-to-film printing has revolutionized how small businesses and hobbyists create vibrant, full-color designs on demand. Whether you're printing a single shirt or a hundred, DTF transfers offer a low-cost, high-impact solution that doesn't require expensive equipment or extensive training.
In this guide, I'll share everything I've learned from countless hours in my home studio, from choosing the right film to troubleshooting common issues. By the end, you'll have the confidence to start your own DTF projects and avoid the mistakes that cost me time and materials.
What Exactly Are DTF Transfers?
At their core, DTF transfers are printed designs on a special film that can be heat-pressed onto various fabrics. Unlike DTG (direct-to-garment) printing, which requires a dedicated printer and pretreated shirts, DTF involves printing a mirror-image design onto a PET film, coating it with adhesive powder, and then transferring it with a heat press. The result is a soft, stretchable print that adheres to cotton, polyester, blends, and even leather.
The magic lies in the adhesive powder. After printing with specialized DTF inks, you apply a thermoplastic powder while the ink is still wet. This powder melts during the pressing stage, bonding the design to the fabric. The process is surprisingly forgiving, making it ideal for beginners.
Why Choose DTF Over Other Methods?
I've tested many printing techniques, and DTF stands out for several reasons:
- No weeding required: Unlike vinyl, you don't need to cut and peel intricate details. The printer handles everything.
- Full-color capabilities: DTF printers use CMYK plus white ink, so you can print photorealistic images, gradients, and fine lines without color limitations.
- Fabric versatility: It works on dark and light garments, natural and synthetic fibers.
- Durability: When applied correctly, DTF prints survive dozens of washes without fading or cracking.
Of course, there are trade-offs. The upfront cost of a DTF printer and supplies can be higher than a vinyl cutter, but if you're producing multiple shirts, the per-unit cost drops significantly.
Step-by-Step: How to Apply DTF Transfers
Applying a DTF transfer is straightforward, but attention to detail makes all the difference. Here's my tried-and-true method:
1. Prepare Your Workspace and Materials
Gather your DTF transfer, heat press, garment, and a lint roller. A clean, flat surface is essential. I always pre-press the garment for 5-10 seconds to remove moisture and wrinkles. This step prevents the transfer from shifting and ensures even adhesion.
2. Position the Transfer
Place the transfer face-up on the garment. If you're using a transfer with a clear carrier film, you can see exactly where it's going. For opaque films, I use a ruler and chalk to mark the center. Remember: the design should be mirrored on the film, so it reads correctly after pressing.
3. Heat Press Settings
Temperature, pressure, and time are critical. For most DTF transfers, I set my press to 325°F (160°C), medium pressure, and 15 seconds. However, always check the instructions from your transfer supplier, as formulations vary. Too hot and the film may scorch; too cold and the adhesive won't fully activate.
4. Press and Peel
After pressing, let the garment cool for a few seconds. Then, peel the film in a smooth, consistent motion. If the design lifts with the film, it means the transfer wasn't pressed long enough or the pressure was too low. In that case, re-press for another 5-10 seconds.
5. Post-Pressing for Durability
For extra longevity, I cover the design with a Teflon sheet or parchment paper and press again for 5-10 seconds. This second press ensures the adhesive fully cures and the print lies flat. It's a small step that makes a big difference.
Common Mistakes and How to Avoid Them
Even seasoned crafters run into issues. Here are the ones I see most often, and my fixes:
Peeling After Washing
If your transfer peels, it's usually due to insufficient pressure or time. Invest in a heat press with a pressure gauge; irons don't provide consistent pressure. Also, wash garments inside out in cold water and avoid fabric softener, which can break down the adhesive.
Dull or Faded Colors
Fading often stems from under-pressing or using incompatible ink. Ensure your printer uses genuine DTF inks and that you're using the correct powder. I once tried a generic powder and the colors looked washed out after one wash. Stick with reputable brands.
Cracking or Stiff Prints
A stiff print usually means too much powder or excessive heat. Apply powder sparingly; you want a light, even coating. If the print feels like plastic, reduce the temperature by 10°F and check again.
Choosing the Right DTF Supplies
The quality of your transfers depends heavily on your materials. Here's what I recommend:
- Film: Look for double-sided matte PET film. It provides excellent ink adhesion and easy release.
- Ink: Use DTF-specific pigment inks. They have the right viscosity and cure properties.
- Powder: Thermoplastic polyurethane (TPU) powder is the standard. Fine powder (80-200 microns) works best for detailed designs.
- Heat press: A clamshell or swing-away press with digital temperature control is ideal. You don't need a top-of-the-line model, but avoid cheap presses with uneven heating.
If you're just starting, consider buying pre-made DTF transfers from a supplier like DTF Transfers specialists. This lets you test the waters without a big investment. As you grow, you can bring printing in-house.
DTF Transfers vs. Other Printing Methods: A Quick Comparison
To help you decide, here's how DTF stacks up against common alternatives:
- DTF vs. Vinyl: DTF wins for complex, multi-color designs; vinyl is cheaper for simple one-color text.
- DTF vs. DTG: DTF works on more fabrics and doesn't require pretreatment; DTG is faster for direct printing but limited to cotton.
- DTF vs. Screen Printing: DTF is more cost-effective for small runs; screen printing is better for large orders of the same design.
Ultimately, DTF is the most versatile for a home-based business or hobbyist because it handles short runs and intricate art without setup fees.
Frequently Asked Questions
How long do DTF transfers last?
With proper application and care, DTF transfers can last 50+ washes. The key is using correct heat press settings and washing inside out in cold water. Avoid bleach and high heat in the dryer.
Can I use DTF transfers on 100% polyester?
Yes, DTF transfers work great on polyester. In fact, they often bond better to synthetic fabrics than DTG. Just be mindful of the temperature; polyester can scorch at high heat, so lower the press temperature to around 300°F (150°C).
Do I need a special printer for DTF?
You can convert an Epson printer with DTF inks and a bulk ink system, or buy a dedicated DTF printer. For beginners, purchasing pre-printed transfers is a smart way to start without the equipment investment.
What is the best way to store unused DTF transfers?
Store them in a cool, dry place away from direct sunlight. Keep them flat or rolled, not folded, to prevent creases. I use a plastic sleeve or a zip-top bag to protect them from dust and moisture.
Can I layer DTF transfers?
Yes, you can layer multiple transfers for a multi-dimensional look. Press the bottom layer first, then add the next, pressing each for the full time. Just ensure the first layer is cool before adding the next to avoid smudging.
DTF transfers have opened up a world of creative possibilities for me, and I'm confident they will for you too. With a bit of practice and the right supplies, you'll be producing professional-quality apparel in no time. If you're ready to dive in, check out the selection at DTF Transfers to get started.