
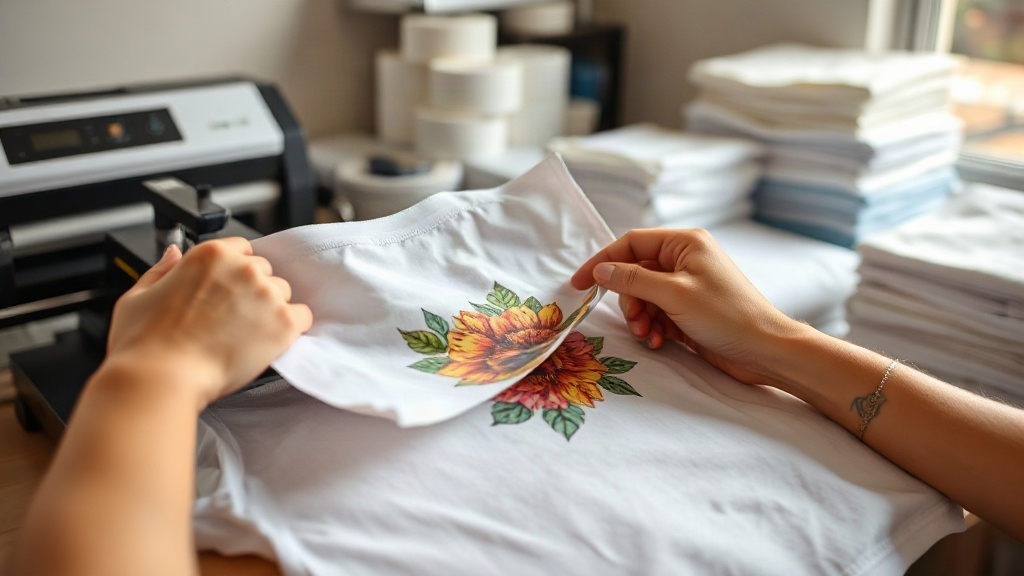
When you first encounter DTF Transfers, you might wonder how a thin film can produce such vibrant, lasting designs on fabric. Direct-to-film printing has rapidly become a favorite among garment decorators, small business owners, and DIY enthusiasts. Unlike other methods, it doesn't require pre-treatment or specialty fabrics, and it delivers exceptional detail. In this guide, we'll explore what makes DTF transfers unique, how to use them, and how to avoid common pitfalls. Whether you're decorating t-shirts for a team or launching a custom apparel brand, understanding DTF transfers can elevate your work.
What Are DTF Transfers?
DTF stands for Direct-to-Film. The process involves printing a design onto a special PET film using a DTF printer equipped with pigment inks. A powdered hot-melt adhesive is applied to the wet ink, then the film is cured. The result is a transfer that can be stored and later applied to fabric with a heat press. The adhesive bonds the ink to the fabric, creating a flexible, stretchable print. Because the design sits on top of the fabric rather than being dyed into it, DTF transfers work on cotton, polyester, blends, and even treated nylon. This versatility sets them apart from DTG or sublimation, which have fabric limitations.
Why Choose DTF Transfers Over Other Methods?
If you've tried screen printing or vinyl, you know the setup time and material constraints. DTF transfers eliminate many of those hurdles. Here's why they're gaining popularity:
- No weeding or masking: Unlike vinyl, there's no tedious cutting and weeding. The design is printed and ready to press.
- Full-color complexity: Photographic images, gradients, and fine details reproduce beautifully without color separation.
- Fabric flexibility: Works on cotton, polyester, cotton-poly blends, and more. No need to stock multiple transfer types.
- Durability: When applied correctly, DTF prints resist cracking, peeling, and fading through many washes.
- Cost-effective for short runs: No minimums, no screens, no setup fees. Ideal for one-offs or small batches.
These advantages make DTF transfers a smart choice for businesses that need agility and quality.
How to Apply DTF Transfers: Step-by-Step
Applying a DTF transfer is straightforward, but attention to detail ensures a professional finish. Follow these steps for best results.
1. Prepare Your Workspace and Materials
You'll need a heat press, the DTF transfer, the garment, and a protective sheet (like parchment paper or a Teflon sheet). Ensure the garment is clean, dry, and free of wrinkles. Pre-press the garment for a few seconds to remove moisture and wrinkles. This step is crucial for adhesion.
2. Position the Transfer
Place the transfer film on the garment with the printed side facing up. The adhesive side is already on the film, so no need to flip. Use a ruler or template to center the design. If you're applying multiple transfers, plan the layout before pressing.
3. Press with Heat and Pressure
Set your heat press to the temperature recommended by your transfer supplier. Typically, it's around 300°F to 325°F (150°C to 160°C). Apply medium to firm pressure for 10 to 15 seconds. Too little pressure and the adhesive won't bond; too much and the design may spread. Always follow the specific instructions that come with your transfers.
4. Peel the Film
After pressing, you can peel the film either hot or cold, depending on the transfer type. Most DTF transfers are cold peel: wait until the transfer cools completely, then peel the film off in a smooth, even motion. If you peel too early, the design may lift. If you're unsure, test with a small corner.
5. Post-Press for Durability
For added durability, place the protective sheet over the design and press again for 5 to 10 seconds. This second press ensures the adhesive fully cures and the print conforms to the fabric texture. It also helps with washability.
Common Mistakes and How to Avoid Them
Even experienced crafters run into issues. Here are frequent pitfalls and their solutions:
- Insufficient pressure: The transfer may peel or crack. Increase pressure and ensure your press is level.
- Wrong temperature: Too hot and the film may scorch; too cool and the adhesive won't activate. Use an infrared thermometer to verify.
- Peeling too soon: Cold peel transfers need to cool completely. Be patient.
- Stretching the garment during application: This can distort the design. Keep the fabric flat and stable.
- Not pre-pressing: Moisture and wrinkles prevent proper adhesion. Always pre-press.
By avoiding these mistakes, you'll achieve consistent, professional results.
DTF Transfers vs. Other Printing Methods
How does DTF stack up against DTG, screen printing, and vinyl? Let's compare.
- DTG (Direct-to-Garment): Best for 100% cotton, but requires pre-treatment and can be costly for small runs. DTF works on more fabrics and often has a softer feel.
- Screen Printing: Economical for large orders, but setup costs and color limitations make it less flexible. DTF excels for detailed, multi-color designs.
- Vinyl: Great for simple text and shapes, but weeding is time-consuming and layered vinyl can be thick. DTF offers full-color complexity without weeding.
Each method has its place, but DTF transfers offer a compelling balance of quality, versatility, and ease.
Choosing the Right DTF Transfer for Your Project
Not all DTF transfers are created equal. When sourcing, consider these factors:
- Ink quality: High-quality pigment inks produce vibrant colors and better wash resistance.
- Adhesive type: Look for transfers with a strong, flexible adhesive that bonds well to your target fabric.
- Film thickness: Thinner films tend to feel softer on the garment.
- Supplier reputation: Read reviews and request samples to test durability.
At DTFMood, we specialize in premium DTF transfers that deliver outstanding results. Our transfers are printed with top-tier inks and adhesives, ensuring your designs look great and last.
Caring for DTF-Printed Garments
To maximize the life of your DTF transfers, follow these care instructions:
- Wait 24 hours before washing.
- Turn the garment inside out.
- Machine wash cold with mild detergent.
- Avoid fabric softeners and bleach.
- Tumble dry low or hang dry.
- Do not iron directly on the print.
With proper care, DTF prints can last for years.
Frequently Asked Questions About DTF Transfers
Can I use DTF transfers on dark and light fabrics?
Yes, DTF transfers work on both dark and light fabrics. The white ink layer in the transfer provides opacity on dark garments, while the colors remain vibrant on light ones. No need for separate transfer types.
How long do DTF transfers last?
With proper application and care, DTF transfers can last 50+ washes. The key is using the right temperature, pressure, and following wash instructions. Avoid harsh chemicals and high heat.
Do I need a special printer to make DTF transfers?
Yes, you need a DTF printer that uses pigment inks and a powder shaker. However, if you're not ready to invest, you can buy pre-made DTF transfers from suppliers like DTFMood and apply them with a heat press.
What fabrics work best with DTF transfers?
DTF transfers adhere well to cotton, polyester, cotton-poly blends, and treated nylon. They are not recommended for fabrics with a heavy water-repellent coating or those that cannot withstand heat.
Can I stretch the garment after applying a DTF transfer?
Yes, DTF transfers are flexible and will stretch with the fabric to some degree. However, excessive stretching may cause cracking over time. For stretchy fabrics like spandex, use a transfer designed for high elasticity.
DTF transfers have revolutionized garment decoration by combining simplicity, versatility, and professional quality. Whether you're a hobbyist or a business owner, mastering this technique opens up a world of creative possibilities. With the right supplies and a bit of practice, you'll be producing stunning, durable prints in no time.