
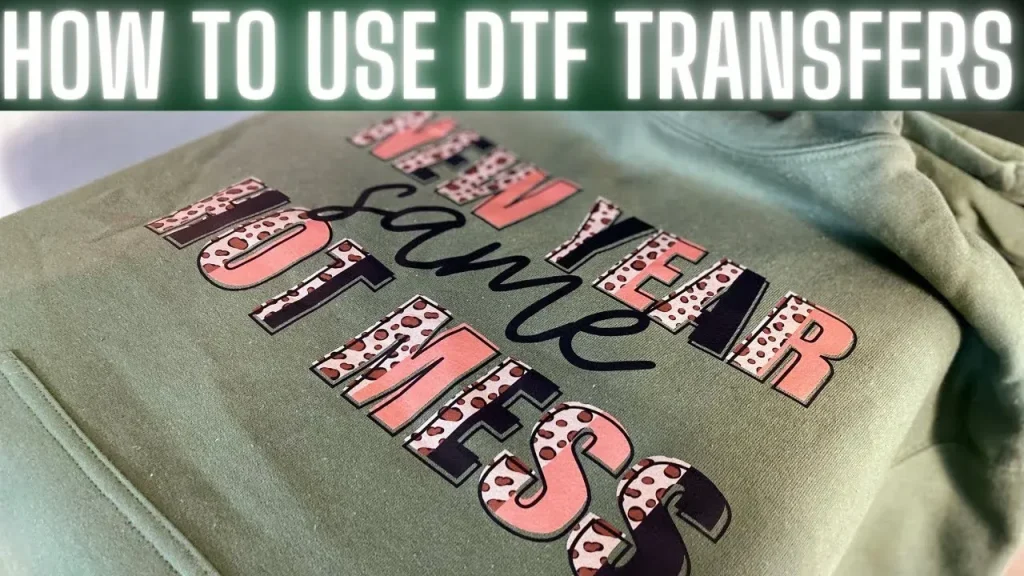
DIY DTF transfers have become a revolutionary method for crafters looking to create vibrant and custom prints right from the comfort of their own homes. With the rise of DTF printing technology, even beginners can easily dive into the process of designing and transferring intricate graphics onto apparel and other fabric items. This innovative technique involves printing your designs onto a special film, which can then be seamlessly applied to materials using heat—a process that ensures durability and striking visual appeal. In this comprehensive guide, we’ll walk you through the entire DTF transfer process, equipping you with essential knowledge and skills on how to make DTF transfers like a pro. Get ready to unlock your creative potential with DIY custom prints that are sure to impress friends and customers alike!
The world of DIY custom printing has evolved dramatically, with direct-to-film (DTF) transfers leading the charge in creative personalization. This approach allows individuals to produce striking visuals on textiles using a straightforward process that marries cutting-edge technology with artistic expression. Whether referred to as DTF printing or simply custom fabric transfers, the methodology remains user-friendly and accessible, appealing to novices and experienced creators alike. In this guide, we will outline not only how to make DTF transfers but also provide key insights into the materials required and the step-by-step DTF transfer guide you need to achieve eye-catching results.
Understanding the Key Components of DTF Printing
When diving into the world of Direct-to-Film (DTF) printing, it’s vital to grasp the components that fuel this innovative process. At its core, DTF printing utilizes a specialized printer designed to handle specially formulated inks that yield rich colors and fine detail. This technology transforms your designs into striking prints that can seamlessly transfer to fabric, making DTF a favorite among custom print enthusiasts. Furthermore, the choice of DTF transfer film plays a critical role in the quality of your final product, as it ensures the ink adheres effectively during the heat transfer process.
Another essential component is the adhesive powder, which serves as a bonding agent between the print and the fabric. This powder minimizes the risk of peeling or fading, ensuring your custom designs maintain their vibrancy and longevity. To truly master the DTF transfer process, it’s crucial to understand how each element collaborates to produce extraordinary results, making your DIY custom prints not only aesthetically pleasing but also durable.
Essential Tools and Materials for DIY DTF Transfers
Embarking on your DIY DTF transfer journey requires a confounding arsenal of tools and materials. First on the list is a high-quality DTF printer, specifically designed to work with DTF inks. These printers are crucial for printing your designs with high resolution, capturing every intricate detail you wish to showcase in your custom apparel or art prints. In addition to the printer, investing in quality DTF inks that promote vivid colors and exceptional print fidelity is paramount for ensuring the success of your projects.
Other indispensable materials include DTF transfer films and adhesive powder, each of which plays a significant role in the final application. The transfer film enables the design to be transferred effectively onto fabrics, while the adhesive powder ensures that the ink adheres securely. Don’t forget the heat press; this device is essential for creating the perfect transfer, offering precise control over temperature and pressure to achieve flawless results every time.
Step-by-Step Process to Create Stunning DTF Transfers
Creating DTF transfers at home may seem daunting, but it’s straightforward with our step-by-step guide. Start by designing your artwork in graphic design software, ensuring to save it in a printer-friendly format. This first step is crucial, as a well-designed layout can significantly impact the overall look of your DIY custom prints. Remember to mirror the image before printing, as it will be flipped during the transfer process. Once your design is ready, print it onto the DTF transfer film using your dedicated DTF printer.
After printing, allow the ink to dry thoroughly before sprinkling on the adhesive powder. This ensures optimal adhesion once you heat press it onto your chosen fabric. It’s essential to follow up with the curing process, which melts the adhesive powder and prepares your design for transfer. Finally, aligning the cured film onto the fabric correctly and applying even heat will produce stunning, high-quality results. Following these meticulous steps will not only streamline your DTF transfer creation process but also lead to impressive end products.
Tips for Flawless DTF Printing Results
Achieving flawless DTF transfers involves understanding some essential tips that can elevate your printing outcomes. First, be sure to experiment with different fabric types, as each can yield varying results; cotton blends may exhibit colors differently than polyester. Additionally, adjusting your heat press settings, such as temperature and pressure, can significantly influence how well the transfer adheres to the fabric. It’s also wise to conduct a few test prints before committing to larger designs, solidifying your understanding of how various materials react to the DTF transfer process.
Investing in quality materials cannot be overstated; using high-grade DTF inks and transfer films not only enhances the vibrancy of your designs but also contributes to their longevity. Regular maintenance of your printer can also prevent issues related to color accuracy and print quality, ensuring that every project meets your expectations. These strategies combined with your keen artistic eye can set you on the path to showcasing custom prints that are both beautiful and durable.
Troubleshooting Common DTF Transfer Problems
Even seasoned crafters can encounter issues during the DTF transfer process. Frequent problems include poor adhesion, where designs may peel away from the fabric; this often results from insufficient heat or pressure applied during the transfer. To troubleshoot this, revisit your heat press settings and ensure that you’re applying the recommended temperature and pressure for your fabric type. Rethreading your materials and ensuring clean prints can also dramatically improve adhesion.
Color fading is another common dilemma that can arise if incorrect printer settings are employed or if the materials used aren’t optimal for DTF printing. It’s crucial to select the right fabrics and to ensure your inks are of high quality to promote color richness. Regular printer maintenance, including cleaning the print head, can help relieve issues of color accuracy and consistency, ultimately leading to successful transfers every time you pull out that DTF setup.
The Creative Potential of DIY DTF Transfers
The realm of DIY DTF transfers presents limitless creative opportunities for artists and enthusiasts alike. By utilizing DTF printing technology, individuals can easily experiment with different designs, textures, and color palettes to create unique garments, home décor, or promotional items. As you become more familiar with the DTF transfer process, you can push your creativity further, customizing apparel with personal messages or intricate patterns that resonate with your audience’s tastes.
Moreover, the ease of producing high-quality prints in small batches makes DTF printing ideal for small businesses or individual artisans looking to showcase their branding. Whether you’re aiming to create personalized gifts or execute marketing strategies, DIY DTF transfers empower you to bring your imaginative ideas to fruition. As you hone your skills and expand your design repertoire, you will discover the vast potential this technique has for elevating your creative projects.
Frequently Asked Questions
What materials are essential for DIY DTF transfers?
To successfully create DIY DTF transfers, you will need a DTF printer compatible with DTF inks, high-quality DTF inks, special transfer film, adhesive powder, a heat press machine, and graphic design software. Having these materials will ensure a smooth DTF transfer process and achieve vibrant results.
How do I make DTF transfers at home?
Making DIY DTF transfers at home involves several steps: create your design using graphic software, print it onto special DTF film, apply adhesive powder to the print, cure the powder, prepare your fabric, and then use a heat press to transfer the design onto the fabric. Following these steps carefully will yield high-quality prints.
What is the DTF transfer process and why is it popular?
The DTF transfer process involves printing designs on a special film that is later transferred onto fabric using heat. This method is popular because it produces durable and vibrant prints that adhere well to various fabric types, making it perfect for DIY custom prints and commercial use.
How can I troubleshoot poor adhesion in my DTF transfers?
If you’re experiencing poor adhesion with your DIY DTF transfers, it may be due to insufficient heat or pressure applied during the transfer. Ensure your heat press is set to the correct temperature and pressure settings, and always ensure that the adhesive powder is properly cured before pressing.
What types of fabrics work best with DTF printing?
DTF printing can be performed on various fabric types, including cotton, polyester, and blended materials. However, the final result may vary between fabrics, so testing different materials is recommended to see which provides the best outcome for your DIY DTF transfers.
Can I use my regular inkjet printer for DIY DTF transfers?
No, standard inkjet printers are not suitable for DIY DTF transfers. You need a specialized DTF printer that uses DTF inks designed to bond with the adhesive powder and fabric during the transfer process to achieve quality results.
| Key Points |
|---|
| DIY DTF Transfers are a method of printing designs onto film for fabric application using heat. |
| Essential materials include a DTF printer, DTF inks, transfer film, adhesive powder, heat press, and design software. |
| The process consists of creating a design, printing on DTF film, applying adhesive powder, curing, preparing fabric, and finally transferring the design. |
| Quality of inks and the choice of fabric significantly influence the outcome of the DTF transfers. |
| Common issues include poor adhesion, color fading, and incomplete transfers, often solvable through proper settings and maintenance. |
Summary
DIY DTF Transfers offer a creative way to personalize your fabric items with vibrant designs and artwork. This popular printing technique allows crafters and DIY enthusiasts to effortlessly produce high-quality images. By mastering the step-by-step process, from selecting the right materials to perfecting the transfer application, you can ensure that your creations are both beautiful and durable. Whether you’re making custom t-shirts, bags, or other fabric items, DIY DTF Transfers empower you to unleash your creativity with impressive results.